Microsoft SSO
Paramify supports login SSO via Microsoft Entra.

As part of Microsoft Entra (aka Azure AD) you can setup an app registration for Paramify to support SSO. See other login methods on the Login Overview.
Create an App Registration
- Go to entra.microsoft.com and sign in as at least a Cloud Application Administrator
- In the side navigation under Identity click on Applications then App registrations
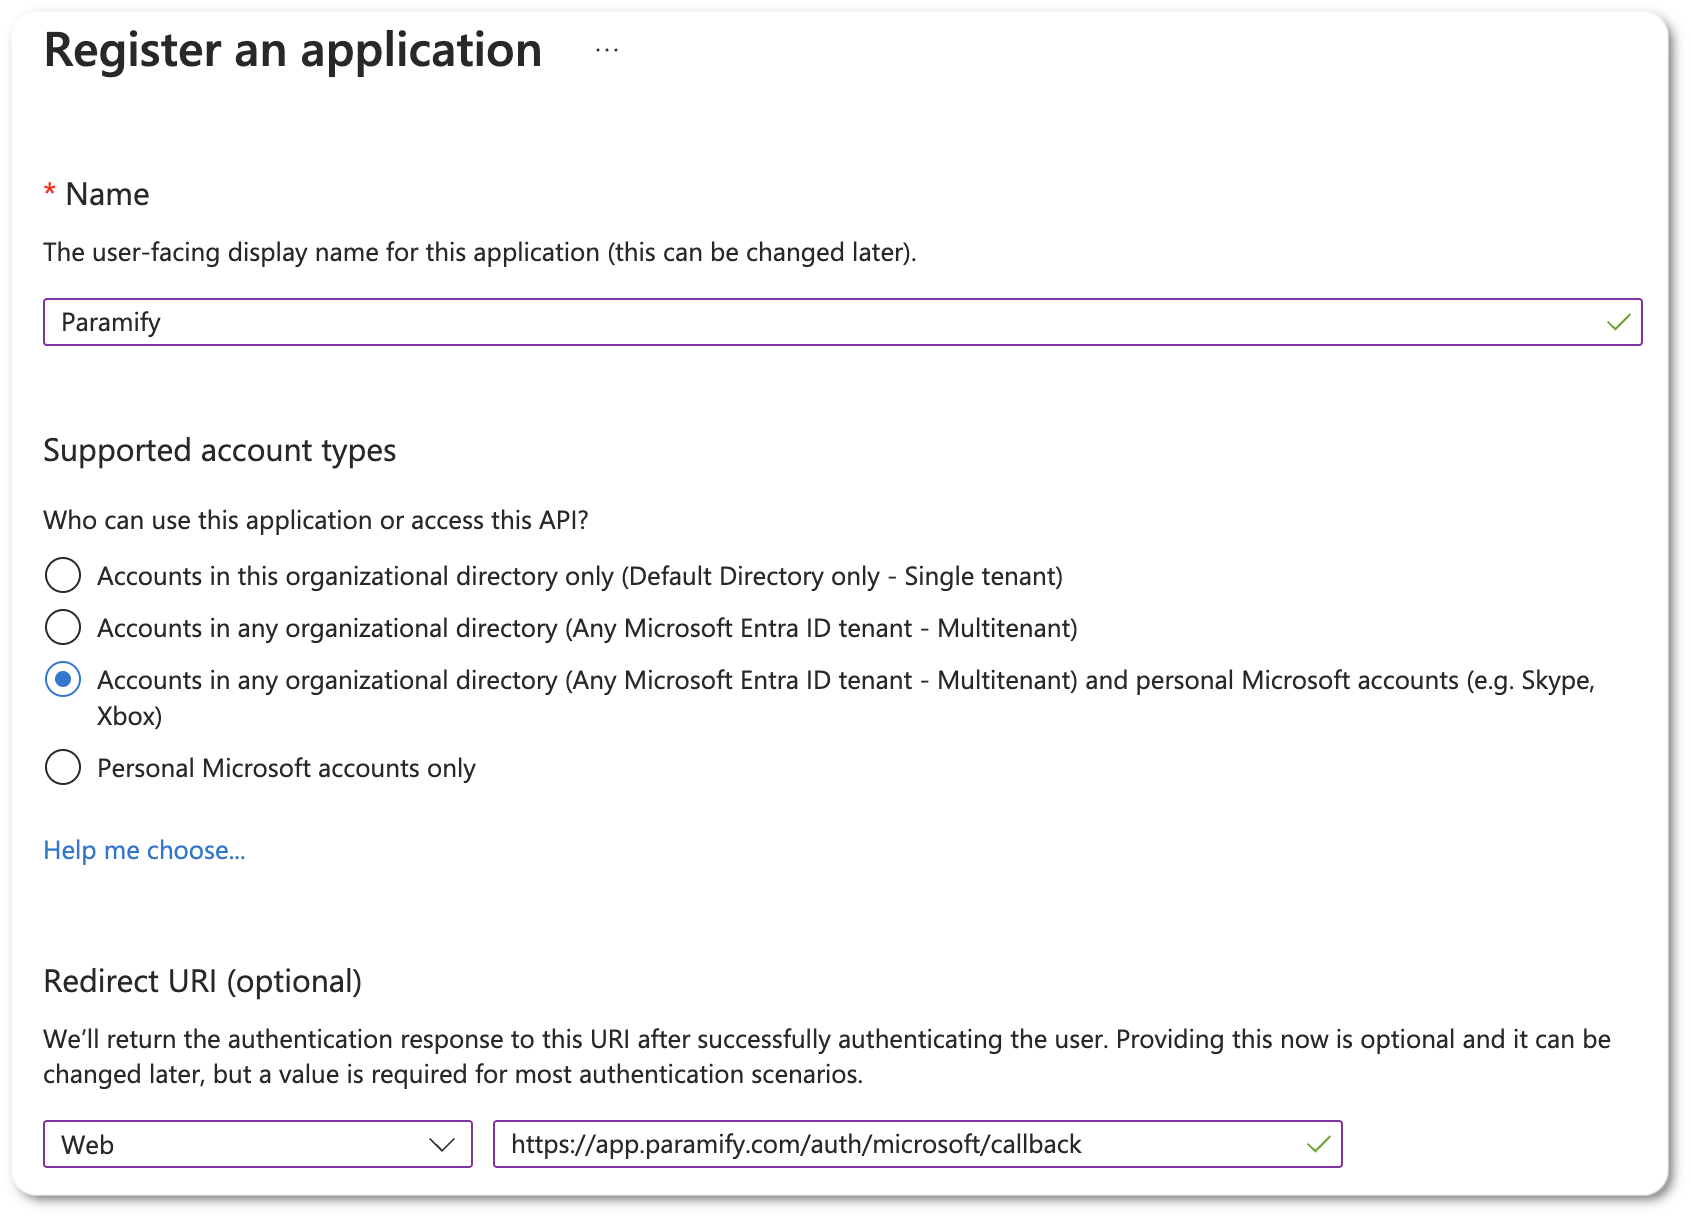
- Click New registration near the top left:

- Set the Redirect URI as Web and then the URL for where Paramify is installed, such as https://paramify.mycompany.com/auth/microsoft/callback (replacing with your domain)
- In the Overview copy the Application (client) ID, which is used for
Microsoft Client IDorAUTH_MICROSOFT_CLIENT_IDbelow - From the Overview click on Add a certificate or secret. Create a new client secret and make sure to copy the value down because it is only viewable on creation. This secret goes into
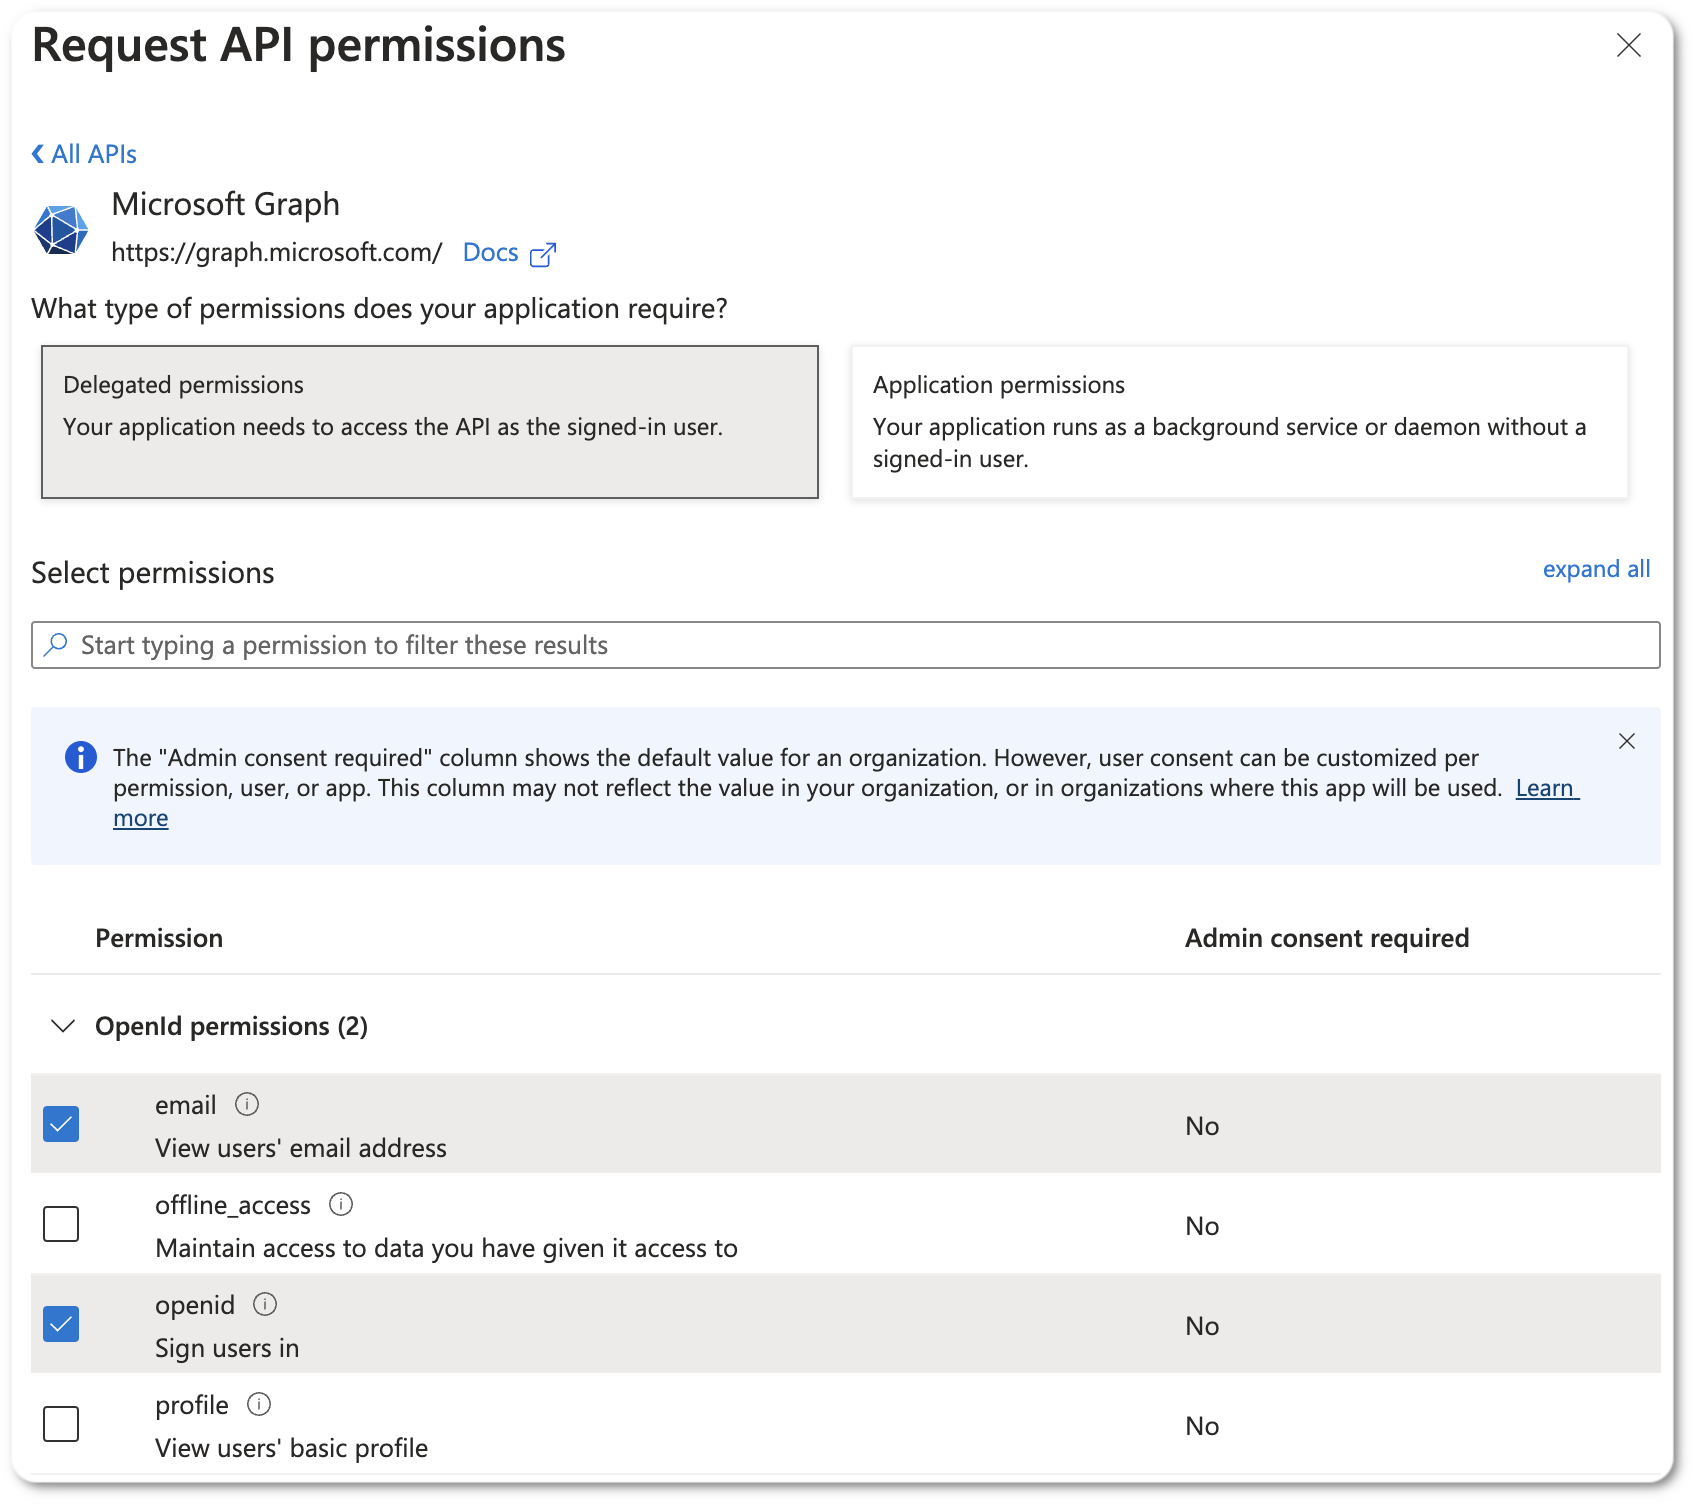
Microsoft Client SecretorAUTH_MICROSOFT_CLIENT_SECRETmentioned below - Go to API permissions tab and add the email and openid permissions:

Configure in Self-Hosted
Once the app registration is created you can setup Paramify to use this with a few configuration options.
If you are using the Paramify Platform Installer then in the config GUI you can check the Enable Microsoft Login SSO box then enter the Microsoft Client ID and Microsoft Client Secret that you collected from the app registration above.
With a Helm-based install you can add the configuration options to your values.yaml in the configmaps.paramify.data section, similar to the following:
configmaps:
  paramify:
    data:
      AUTH_MICROSOFT_ENABLED: "true"
      AUTH_MICROSOFT_CLIENT_ID: "<client_id>"
AUTH_MICROSOFT_CLIENT_SECRET: "<client_secret>"configmaps:
paramify:
data:
AUTH_MICROSOFT_ENABLED: "true"
AUTH_MICROSOFT_CLIENT_ID: "<client_id>"
AUTH_MICROSOFT_CLIENT_SECRET: "<client_secret>"Be sure to replace the client_id and client_secret with the respective values from the app registration above.